Because your concrete goose deserves a wardrobe upgrade.
If you’ve got a porch goose sitting outside your front door, you already know the unspoken rule: that goose needs an outfit for every season. And if you’ve been in any crafting corner of the internet lately, you’ve probably seen sublimation taking over and for good reason. It’s one of the most satisfying DIY craft projects you can do at home, and once you try it, you’ll be looking at everything in your house, wondering if you can heat press it.
Full Disclosure: This article may contain affiliate links. For more info, see the Disclaimer Policy
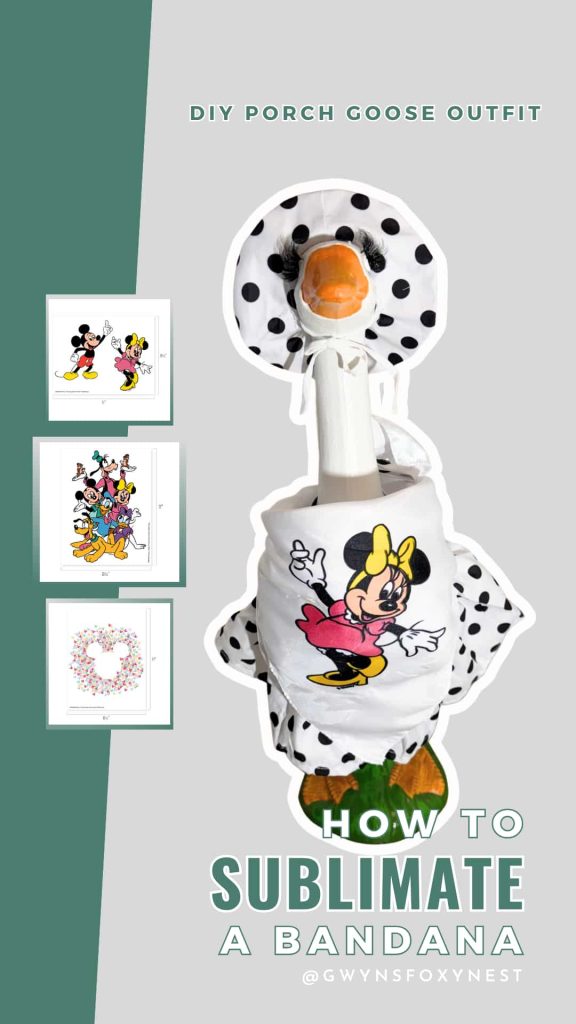
Today we’re talking specifically about how to make a custom sublimated bandana for your DIY porch goose outfit. It’s an easy, beginner-friendly project, the results look incredibly polished, and it’s honestly one of those cute sublimation designs that gets more compliments than you’d expect from a craft that took under an hour.
Supplies You’ll Need For DIY Porch Goose Outfit:
Before we start, let’s round up your supplies. This is a great sublimation for beginners project because the supply are easy to obtain and the project is easy.
Amazon Porch Goose Outfit:
- 23″ Porch Goose (This is not the one I used, but I would recommend it if the one below is not available in your area)
- Bathrobe Porch Goose Outfit
- Bikini Porch Goose Outfit
- Porch Goose Outfit Eyelash
Amazon Sublimation Items:
- Sublimation Bandana (this part is non-negotiable! Sublimation only bonds to polyester fibers, so 100% cotton won’t work. It’s recommened to be at least 70% polyester).
- Cricut EasyPress Mini Heat Press (This is the one I use in the video. I think the larger Easypress would make it easier).
- Sublimation Press Tape
- Sublimation Gloves
- Scissors
- Ironing Board
- Parchment Paper
You can find all the items together in my Amazon Storefront.
Chalk Couture Heat Press Designs
- Power Couple Character Heat Transfer
- All Sublimation Heat Transfers
Walmart
- 19″ Porch Goose (This is the one I used in the video)
How To Sublimate For Beginners Step By Step Online Tutorial

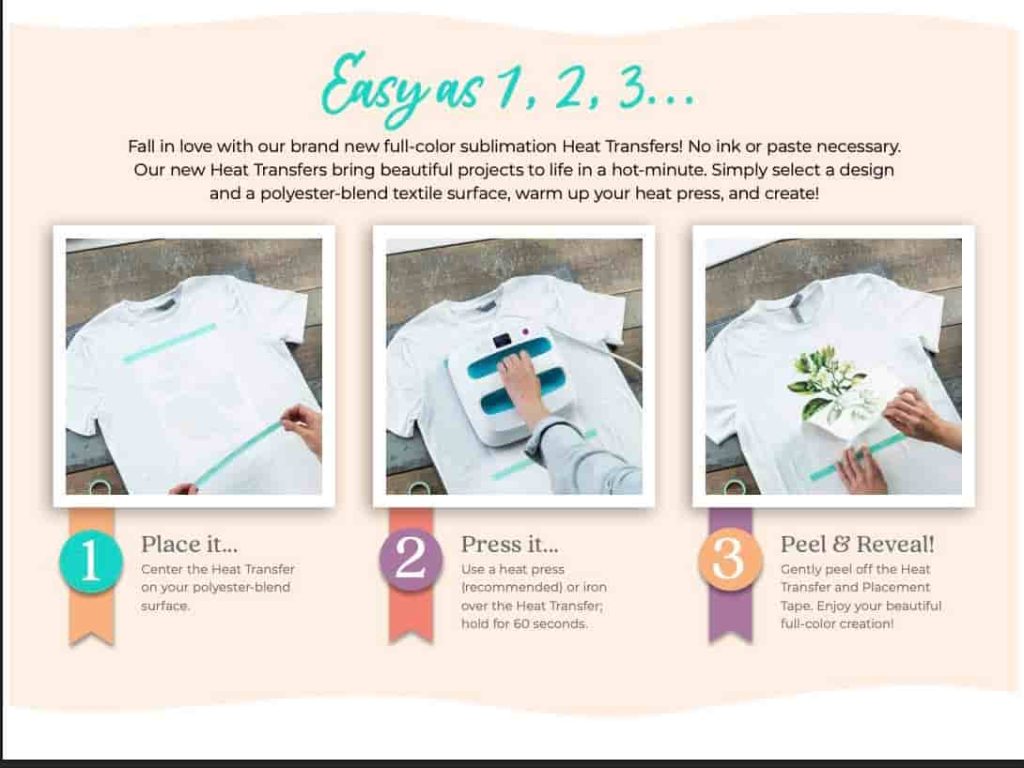
Step 1: Prep Your Bandana and Heat Press
Pre-press your polyester bandana for about 5-10 seconds to remove any moisture or wrinkles. A smooth, flat surface is going to give you a much cleaner transfer, and moisture is the enemy of a crisp sublimation print.
While your bandana is still warm and flat, position your printed transfer face-down onto the fabric exactly where you want it. Use small pieces of heat-resistant tape to secure the edges of the paper so nothing shifts when you close the press.
Lay a piece of parchment or butcher paper both underneath and on top of your project. This protects your heat press platens from any ink bleed-through and keeps everything clean.
Step 2: Press It
Here’s where the heat press projects magic actually happens. For a polyester bandana, you’ll generally want to press at:
- Temperature: 360°F
- Time: 60 seconds (For each section if doing it in sections)
- Pressure: Medium to firm
For the Cricut EasyPress Mini Heat Press this would be the high setting.
Every heat press runs a little differently, so if this is your first time sublimating on fabric, do a small test press first. Once you’re confident in your settings, allow the press to do its thing.
When the timer goes off, remove the press and carefully peel the transfer paper back while it’s still hot. This may require to wear gloves because the design will still be very hot. This is called a hot peel, and for most sublimation on fabric, it gives you the cleanest results. Pull it back slowly and evenly. If you rush it, you can get ghosting or uneven edges.
There it is. Your design, permanently embedded into the fibers of that little polyester bandana.
Step 3: Style Your Goose
Now for the best part of any porch goose clothes DIY project: dressing your goose. Fold the bandana into a triangle, drape it around your goose’s neck, and tie it with a simple knot. You can also fold it smaller for a neater look, or leave it a little loose and casual, depending on the vibe you’re going for.
Seriously, there is something deeply satisfying about a cute goose in a custom bandana. Neighbors will stop and look. People will ask where you got it. And you get to say you made it yourself with a sublimation heat transfer and a heat press.
A Few Extra Tips for Beginners
If you’re just getting started with sublimation, here are a few things that would have saved me some trial and error early on:
Always use at least 70% polyester. A polyester-cotton blend will give you a washed-out, faded result. The higher the poly content, the more vibrant your colors will be.
Don’t reuse transfer paper. Once it’s been pressed, all the ink has transferred out. There’s nothing left to reuse, and trying will just waste your time.
Lint roll first. Any fuzz or debris trapped between your transfer and your fabric will show up in your finished print. A quick lint roll before pressing makes a real difference.
Store extra transfers flat. If you have an extra bandana designs to press later, keep them in a cool, dark place and lay them flat so the ink doesn’t degrade before you use them.
Why This Project Is So Worth It
For anyone looking for heat press projects that are quick, satisfying, and actually useful, a porch goose bandana checks every box. The materials cost next to nothing, the process takes less than an 30 minutes from design to dressed goose, and the results look like something you’d pay real money for at a boutique shop.
Once you get comfortable with this process, you’ll realize just how many things to sublimate on are sitting right in your house …
… tote bags, tea towels, coasters, keychains, t-shirts.
But there’s something especially fun about starting with a tiny bandana for a concrete goose on your front porch.
It’s a little silly. It’s a lot charming. And now it’s 100% yours.
Happy pressing!
Looking for more DIY porch goose outfit ideas or beginner sublimation projects? Drop a comment below! I’d love to hear what your goose is wearing this season.