Press-on nails have come a long way — and if you’re here, chances are you’re ready for a manicure that looks salon-fresh without the salon time (or price tag). I remember opening my first set of Nail Dashes thinking, “There is no way these are going to stay on.” Spoiler alert: they did — and now I’m hooked.
Whether you’re brand new to press-ons or just want your mani to last longer, I’m walking you through exactly how I apply mine for a picture-perfect, long-lasting set. No guesswork, no stress — just real tips that actually work.
Full Disclosure: This article may contain affiliate links. For more info, see the Disclaimer Policy

Congrats on your first set of Nail Dashes! 🎉
Now you’re probably staring at the box like, “Okay… now what?”
Don’t worry — I’ve got you. Let’s jump right in.
Everything you need to apply your new Nail Dashes comes neatly packed in the kit… with one small exception: a dehydrating step. This part is super important because it helps the nails stick better and last longer (and yes, I learned that the hard way 😅).
To dehydrate your nails, you can use something you likely already have at home:
- 100% acetone nail polish remover, or
- A nail dehydrator
Personally, my go-to is Red Aspen’s Nail Dehydrator — it’s quick, easy, and works like a charm.
Once your nails are properly dehydrated, you’re officially ready to start applying — and this is where the fun really begins 💅✨

Step 1: Sizing Your Nails
Choosing the right size Nail Dash for each nail is one of the five most important steps to getting that 7–14 day, picture-perfect mani. And let’s be real — step one is picking the right brand, which you already nailed!
Now for the part that takes the most time in the whole process: sizing. This is where patience comes in. Don’t be surprised if you don’t get it perfect on your first — or even second — application. I definitely didn’t. Expect to make a few small tweaks as you figure out what works best for your nails.
Here’s the rule I swear by when choosing sizes:
- The Nail Dash should just barely cover your natural nail
- If you can see your natural nail peeking out along the sides, it’s too small
- If you feel the dash pressing into the skin around your nail, it’s too big
Once you’ve found the right size for each finger, do yourself a favor and write them down. Trust me — future you will be so grateful. And if you notice one stubborn nail that keeps popping off, try adjusting just that finger by going one size up or down. Sometimes a tiny change makes all the difference.
Stick with it — once your sizing is dialed in, everything else gets so much easier 💅✨

Step 2: Prepping Your Nails
Sanitize Those Nails
Before anything goes on your nails, they need to be clean, oil-free, and totally dry — this step is non-negotiable (ask me how I know 😅).
Start by washing your hands and lightly scrubbing your nails with your favorite grease-cutting dish soap, or swipe each nail bed with rubbing alcohol. The goal here is to remove every bit of oil or residue so the glue has something solid to grip.
Once that’s done, pause for a second and make sure your nails are completely dry before applying any glue. No rushing this part — clean, dry nails are the secret to long-lasting press-ons 💅✨

Gently Push Back Your Cuticles
This step might seem small, but it makes a huge difference. Gently pushing back your cuticles creates a clean surface so the Nail Dash can lay flat and stay put longer.
Use the cuticle pusher from your kit (or whatever you have on hand) and be gentle — no need to go full salon mode here. You’re just nudging them back, not scraping or cutting. A little goes a long way, and your nails will thank you later 💅

Step 3: Dehydrate Your Nails (Do. Not. Skip.)
This step is everything when it comes to how long your Nail Dashes last — and your skin type really matters here. I learned pretty quickly that dry nails and oily nails need different approaches.
If you have dry skin, you don’t need anything heavy-duty. Simply sanitizing your nails with rubbing alcohol is usually enough to get the job done.
If you have oily skin (and honestly, I’d say that’s about 80% of us), proper dehydration is so important. In this case, apply a nail dehydrator liberally to each nail bed. This helps remove excess oils so the glue can fully bond.
I cannot stress this enough: do not skip this step. Skipping dehydration is the fastest way to a pop-off. My personal go-to is Red Aspen’s Nail Dehydrator, and it’s what I use every single time — highly recommend 💅✨
Step 4: Buff Your Nail Beds
This step is all about creating a little texture so your press-on nails have something to grip onto. Smooth, shiny nails = slippery. Lightly buffed nails = way better hold.
Use the pink side of the file that came with your Nail Dash set and gently buff each nail bed. You’re not trying to thin your nails or go aggressive here — just a soft, quick buff to take away the shine.
One exception: if you have extremely dry skin, you may want to skip this step. Your nails might already have enough natural texture, and over-buffing can actually work against you.
When done right, this step helps your press-ons stay put and look flawless 💅✨

Step 5: Applying Your Nails
Pro Tip Before You Apply
If you’re new to press-on nails, here’s a tip I swear by: apply them at night, right before bed. This gives the glue plenty of uninterrupted time to fully set — no hand washing, no chores, no “oops I forgot” moments. You’ll wake up with nails that feel way more secure.
When it’s time to apply, always start with your pinky nails and work your way toward your thumbs. It sounds random, but trust me — it makes the process smoother and keeps you from accidentally bumping freshly applied nails.
For glue placement, add a small dot of glue to the back of the Nail Dash, then spread it around the middle and lower portion of the nail. This helps prevent air bubbles and gives you an even, strong hold where it matters most.
Slow and steady here pays off in long-lasting, gorgeous results 💅✨

Next, apply a thin layer of glue directly to your natural nail bed and gently spread it out. Be careful to avoid getting glue on the skin around your nails — less mess now means a cleaner look later.
Once you press the Nail Dash down, the glue will naturally spread and seal everything in place. No need to overdo it — the pressure does the work for you 💅

Now it’s time to apply the Nail Dash. Place it on your nail at about a 45-degree angle, then gently press it down into place. Once it’s centered, press and hold for at least 30–60 seconds.
You only need light, steady pressure — just enough to keep the nail in position. Pressing too hard actually works against you. If all the glue squeezes out the sides, there’s barely anything left underneath to hold the nail on, which is one of the biggest causes of pop-offs.
Slow, gentle, and patient here = nails that stay put 💅✨

The goal here is simple: hold the Nail Dash in place just long enough for the glue to set.
A key tip — do not release pressure or wiggle your finger during this time. Even a tiny shift can mess with the bond. Keep that finger steady for the full 30–60 seconds, and then you can finally let go. Patience now means nails that last longer and look flawless 💅✨

Tap here to see all current nail options!
Nail Glue Tips You Need To Know
Glue Can Get Messy — Here’s How to Keep It Under Control
First rule of press-on nails: a little glue goes a long way!
If you’re using the classic tube glue that comes in every set, start light-handed. A little tip I love: take a scrap piece of paper and practice squeezing the tube. Play with the pressure until you get a small, pea-sized dot — that’s your sweet spot. Once you’ve got it, you’re ready to glue your nails just like we talked about above.
My personal favorite is Red Aspen Nail Glue — it’s the salon-grade, acrylic-strength glue that comes in every Nail Dash set. It has an amazing grip, which is why your nails can last anywhere from 1–3 days or up to 7–14 days, depending on how much glue you use.
For nails that last up to two weeks, apply a layer of glue both to your nail bed and the back of the press-on nail. Make sure the layer isn’t too thin — a weak layer means a weak seal.
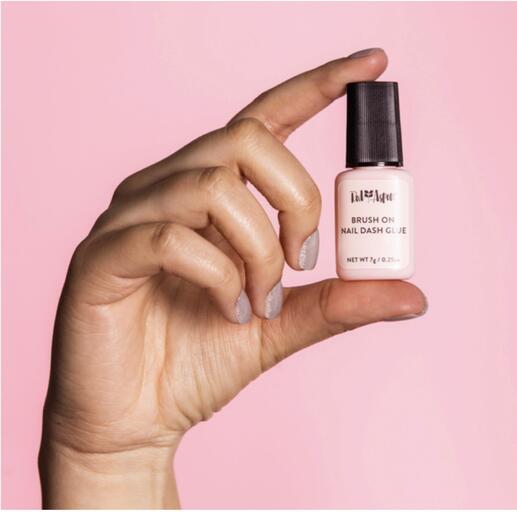
We also offer brush-on glue, which I highly recommend if your nail beds are on the dry side. It’s the same glue as the tube, but thinner, which helps it adhere to dry nails without causing damage when you remove them.
If your nail beds are normal to oily, don’t be shy — you’ll need more glue than you think to get that full 7–14 day hold. I usually do 2–3 coats on the nail bed and 1–2 coats on the back of the press-on nail for maximum staying power.
Follow these tips, and your nails will stick around long enough for you to strut your stuff — without a mess in sight 💅✨
Why I Love Red Aspen’s Nail Glue
Red Aspen’s nail glue bonds like acrylic — strong and durable — but here’s the best part: it’s designed to break down over time. That means it gives your nails a serious hold without wrecking your natural nails. 💅
With amazing glue like this and proper press-on nail removal, your natural nails can stay healthy, strong, and ready for your next mani.
How To Apply Press On Nails With Sticky Tabs
We also have a third option for applying your Nail Dashes: Nail Dash Tabs ⬇️

Nail Dash Tabs: Quick, Easy, and Low-Maintenance
Nail Dash Tabs (aka nail sticker tabs) are perfect if you’re looking for a short-term mani, with a wear time of about 1–5 days.
Want a little extra staying power? Use the Tabs plus a dab of glue on the back of the press-on nail, and you can stretch that wear to about 7–10 days. The grip won’t be as strong as full-on glue since they’re just double-sided sticky tabs, but they have a super low profile, so your nails still look smooth and natural.
These tabs are ideal for:
- People who can’t use glue
- Anyone who only wants to wear press-ons for a short period
- Nail beds that are flat — the dash tabs + glue method works beautifully here.
They’re a quick, gentle, and fuss-free way to get nails that look polished without committing to a full-on glue mani 💅✨
Tip!
Here’s a little setup tip that will save you from sticky fingers: keep an alcohol pad, cotton ball, or a Q-Tip soaked in rubbing alcohol right next to you while you’re applying.
If any glue squeezes out the sides of the nail (it happens), don’t panic. After you’ve held the nail in place for the full 30–60 seconds, grab the alcohol and immediately wipe away the excess glue. This keeps everything clean and gives you that smooth, salon-finished look without messing up the seal 💅✨

Nail Pop-Off Help
It Happens To Everyone
If you get a pop-off, don’t stress — it happens. The fix is easy. Just repeat the steps above and re-glue the press-on nail back on like normal.
Pro tip: if that pop-off happens close to when you were already planning to remove your nails, keep it simple. Skip the full nail prep and just clean your natural nail with alcohol, then glue the press-on back on. This helps prevent that one nail from becoming way too secure and turning removal into a struggle later.
If you redo all the prep steps, that nail can easily stay put for another 7–14 days — great when you want it, not so great when you’re ready to take them off 😅
Once you get the hang of it, applying press-on nails becomes quick, easy, and honestly kind of fun. The key is all in the prep, sizing, and glue application — do those right, and your nails will look flawless for days (or even weeks).
Don’t worry if your first set isn’t perfect. Every application gets better, and small tweaks make a huge difference. Whether you choose glue, tabs, or a mix of both, the goal is the same: beautiful nails.
Take your time, trust the process, and enjoy your mani — because great nails should fit your life, not complicate it 💅✨
One of my favorite things about Red Aspen press-on nails is …. They’re reusable.
As long as you remove them properly and keep track of your sizes, you can wear the same set multiple times. I like to gently clean any leftover glue from the back of the nail after removal, store them back in their case, and they’re ready for the next wear. It’s budget-friendly, less wasteful, and makes press-ons an even better alternative to salon nails.
How To Remove Press-On Nails
When it’s time to say goodbye to your press-on nails, slow and gentle is the name of the game — this is how you keep your natural nails healthy.
Grab a bowl and fill it with warm water, a little olive oil, and your favorite dish soap. Soak your nails for about 10 minutes to help loosen the glue or nail tabs. Once they’re ready, gently pop the nails off — no forcing or prying. If a nail isn’t ready, soak a little longer and try again.
Taking your time during removal makes all the difference and helps keep your press-ons reusable for next time 💅✨
You can use a wood cuticle stick that comes with the Nail Dash set or the Nail Dash removal tool to help with the removal process.
FAQs
Do I need to buy a full set of Red Aspen nails to get the glue?
No, you can buy the Red Aspen Brush On Nail Dash Glue separately.
Do I need to wait before I reapply another set of press on nails?
Yes, I recommend waiting at least 5-7 days or for as long as your nails need a break.
Related Articles

19 Valentine Nails designs
Romantic Valentine nails designs inspired by love, emotion, and beauty. Discover heartfelt designs that turn your nails into a poetic expression of Valentine’s magic.
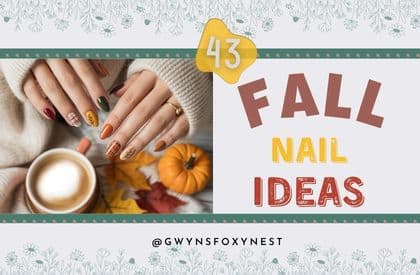
43 DIY Fall Nail Ideas vs. Professional Salon Nails
Discover the best fall nail designs! From sweater nails and plaid art to rich autumn shades, find cozy and stylish manicure ideas for the season.
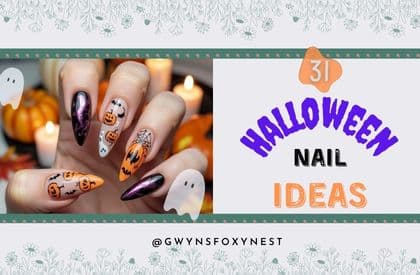
31 Ideas For Halloween Nail Designs
Discover the best Halloween nail art ideas! From spooky ghost and pumpkin nails to glam vampire designs and glow-in-the-dark styles, explore DIY tutorials, trending nail shapes, and professional tips for the perfect Halloween manicure.