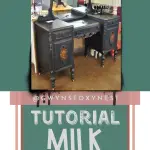
Do you have that old piece of furniture that’s seen better days and is ready for a DIY project? Wondering how to breathe new life into it without breaking the bank? Look no further! Let’s explore how to milk painting furniture, a technique that’s not just easy but also a budget-friendly painting project.
Full Disclosure: This article may contain affiliate links. For more info, see the Disclaimer Policy
Please note: I did receive a free product for my honest opinion. I did not receive additional compensation.
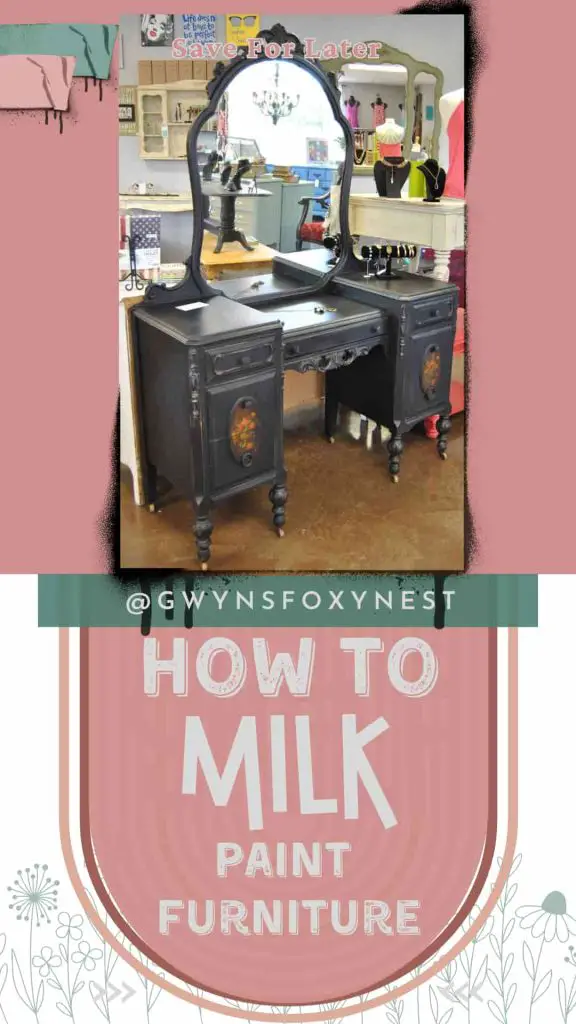
I was excited when General Finishes requested I try lamp black milk paint. I’ve been wanting to try milk paint and wanted to see if the lamp black was a true black paint color.
It was and I’m glad I tried it. I liked it came premixed and I didn’t have to worry about measuring out the powder form.
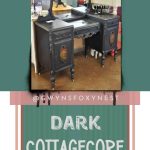
Milk paint is known for it’s natural “chippy” appearance. I decided not to do the chippy appearance but a distressed aged look.
This piece turned out gorgeous and was just the color it needed. It turned out to be one of my favorite milk paint projects.
They have a variety of milk paint colors to choose from.
Supplies List
- Piece Of Furniture
- General Finishes
- Annie Sloan (Optional: I only used the AS wax because I already had it on hand and knew the results would live up to my customers’ expectations.)
- Paint Brush – (For smaller pieces just grab a sponge brush from Dollar Tree)
- Annie Sloan Clear Wax or any clear furniture wax. –
- Wax Brush – or cloth
- Dollar Tree
- Sanding block
Step-By-Step Process – How to Milk Paint Furniture
Preparing Old Furniture For General Finishes Milk Paint – Cleaning and Sanding
Work in a well-ventilated area.
Clean
Before you start painting, ensure that the original finish is clean and free from any dirt or grime. Use the Lysol wipes to wipe down the furniture piece.
Tip: If the furniture needs more cleaning, I would recommend using TSP heavy-duty cleaner to clean off the grime or years of furniture polish. Just follow the directions on the box to create the cleaner and go over the furniture piece.
Sand
Sand an existing finish of wood furniture with a 220 sanding pad or 400-grit sandpaper.
Then wipe all dust from the surface with a damp cloth or towel. This further cleans the surface, removing built-up dirt, grime, and oil from hands.
Applying General Finishes Lamp Black Milk Paint
Now, Let’s start painting over the existing finish!
For best results take a stir stick and stir the paint once you open it to make sure the paint is applied evenly.
Now start applying the paint to the entire surface with even brush strokes.
Let the milk paint dry for 2+ hours between each coat! It’s normal to apply 2-3 coats of paint.
….Trust the process! I promise it gets better!! …
SAND in between coats to improve smoothness and adhesion use a fine-grade (220-320) foam sanding sponge or 400-grit sandpaper between coats. Do not use conventional steel wool.
Remove dust after each sanding with with water-dampened cloth.

Distressed Furniture Finish (Optional)
After you have applied all the 2-3 coats to the painted surface the furniture piece can be distressed.
I used the distressed painting technique to achieve my desired results because I wanted the piece to have an aged look. Plus, I love this painting technique because it hides all the imperfections
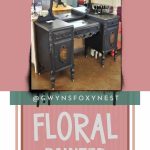
I also wanted to keep the original floral painting on the drawers of this piece. It’s such a great example of a cottagecore furniture piece. I thought the flowers gave it so much unique character.
Distress can be easy and add charm to any project. With milk pain, I was able to use a Lysol wipes to remove the top coat of paint in certain areas I wanted to see the underneath colors. It’s a lot less of a mess.
You can also use a sanding block to distress the paint and to remove the paint in certain areas.
Protect Painted Furniture Piece
Protect – Apply a protective layer. I used Annie Sloan wax on my piece but General Finishes does provide a top coat layer as well. Use what works best for you.
Milk Paint Curing Process
It takes milk paint 21 days to cure and harden to full use.
Avoid heavy use of the furniture until it’s completely cured. Treat gently, and do not clean with commercial products within the first 21 days.
Clean Paint Brushes
You can use soap and water to clean the paintbrush.
As you paint different furniture pieces you’ll discover each furniture painters have their own unique style and steps they like to follow. The above steps are to get you started and you’ll learn as you go to what works best for you.
As we wrap up this milk-painting extravaganza, remember, that your furniture is a canvas waiting for your artistic touch. With milk paint, the possibilities are endless. Unleash your creativity and embark on a journey of transformation!
Have a different project and need to know if General Finishes milk paint is right for it. They have a great instructions section and FAQ’s to help you out.
Frequently Asked Questions
Q1: Can I use milk paint on already painted furniture?
Yes, you can! Just make sure to sand the surface for better adhesion.
Q2: How long does it take for milk paint to dry?
The drying time varies, but generally, it takes approx 2+ hours for each coat.
Q3: Can milk paint be used on outside furniture?
Yes, it can and does not need a top coat.
Transforming your furniture with milk paint is not just a DIY project; it’s a journey of creativity and self-expression. So, grab your brushes and let the furniture magic begin!
Related Articles

7 DIY Boho Painted Furniture Ideas
Discover 7 stunning and creative DIY Boho painted furniture ideas that will add a touch of bohemian charm to your home. Get inspired and unleash your creativity with these unique projects!